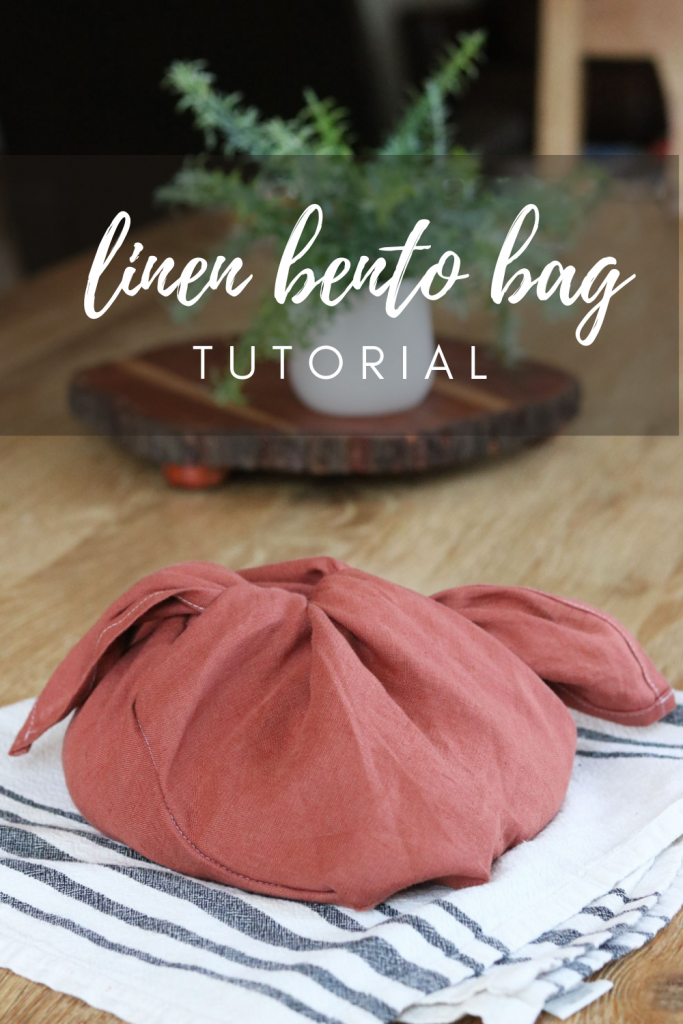
Origami bento bags are handy little farmers market totes or a great way to gift a loaf of sourdough bread to a friend. This linen bento bag tutorial will outline the steps needed to make yourself one.
What do you use a bento bag for?
- lunch bag
- reusable gift bag
- fresh produce bag
- bread bag
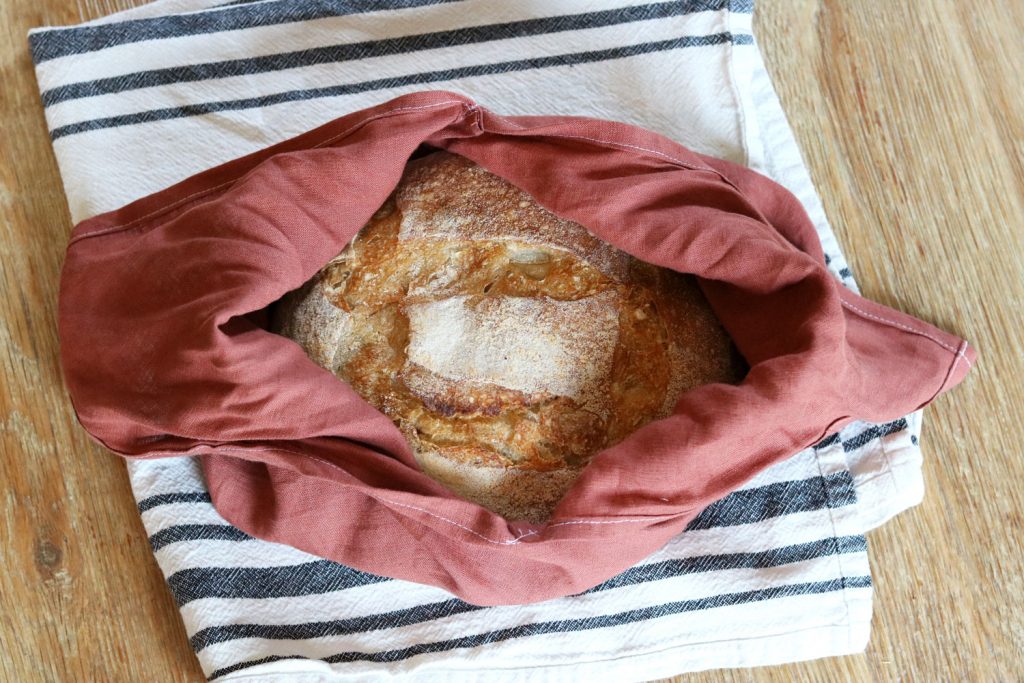
Within the last year, I started making sourdough bread. After baking my bread and letting it cool, I like to wrap it with a towel. However, I discovered these cute linen bags that the bread fits right into and decided to try make one.
Supplies needed
- linen fabric
- scissors/rotary cutter
- iron
- sewing machine
- pen
- ruler
How to Make a Linen Bento Bag
Cutting and hemming the fabric.
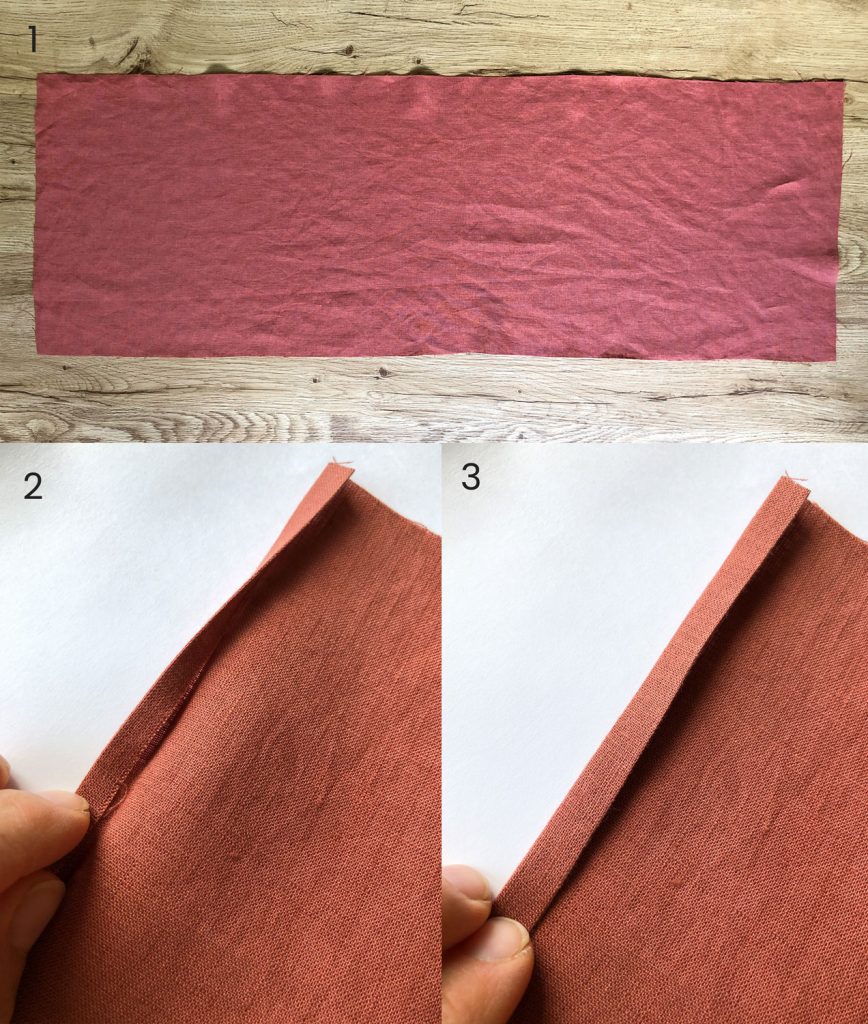
Step 1. Cut the fabric. The finished size of your fabric will be three times as long as it is wide. I wanted my piece of fabric to be 12″ x 36″ once the seams were finished; therefore, I started with a piece of fabric that was 14″ x 38″ to allow for seam allowance. Cut this piece of linen fabric with scissors or a rotary cutter.
Step 2. Hem the fabric. To begin, fold fabric over 1/2″ on each side and press with an iron.
Step 3. Fold it over another 1/2″ and press with an iron again to create a nice hem.
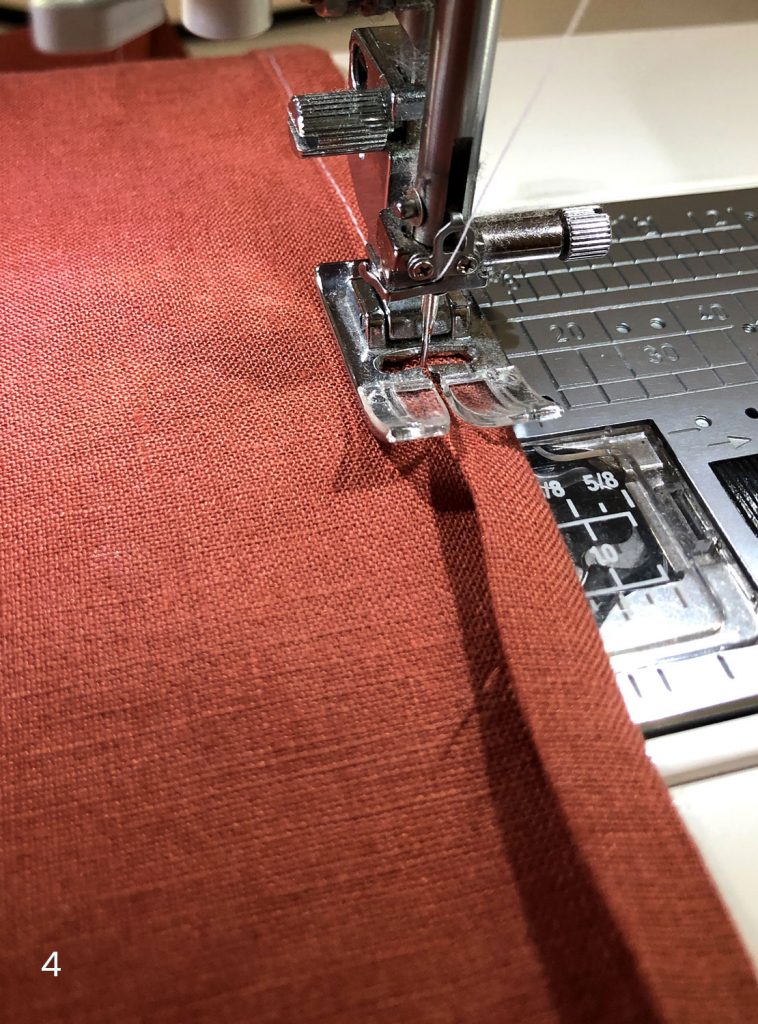
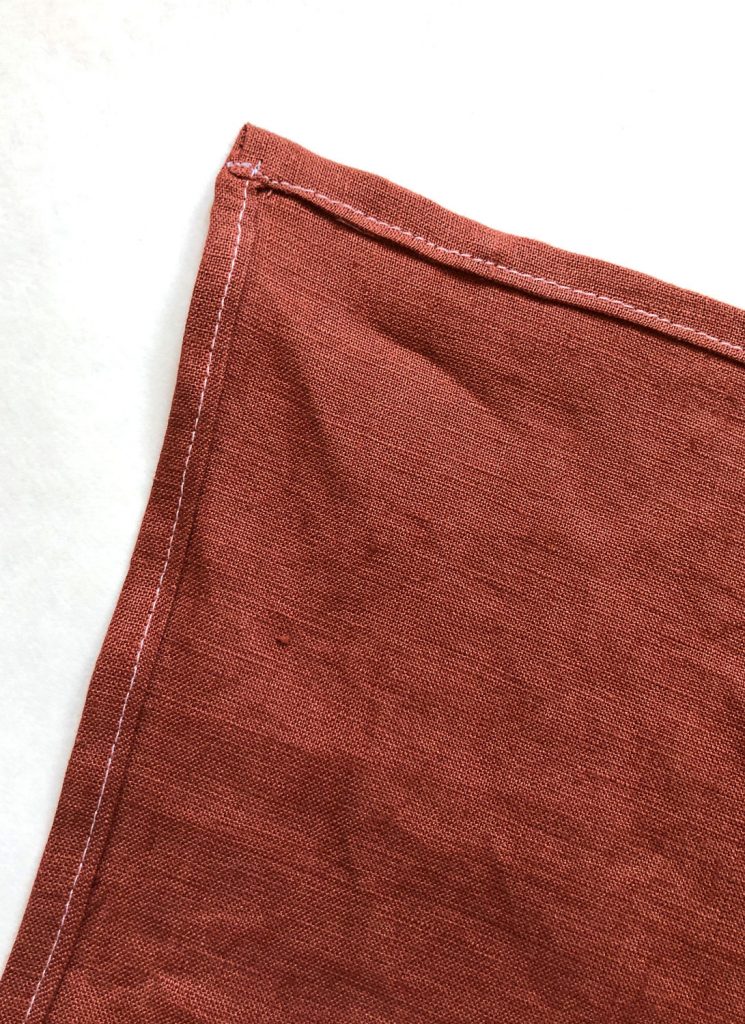
Step 4. Stitch the hem. Using your sewing machine, stitch around the hem you just ironed to finish all the edges.
The hemmed edges will now look like this.
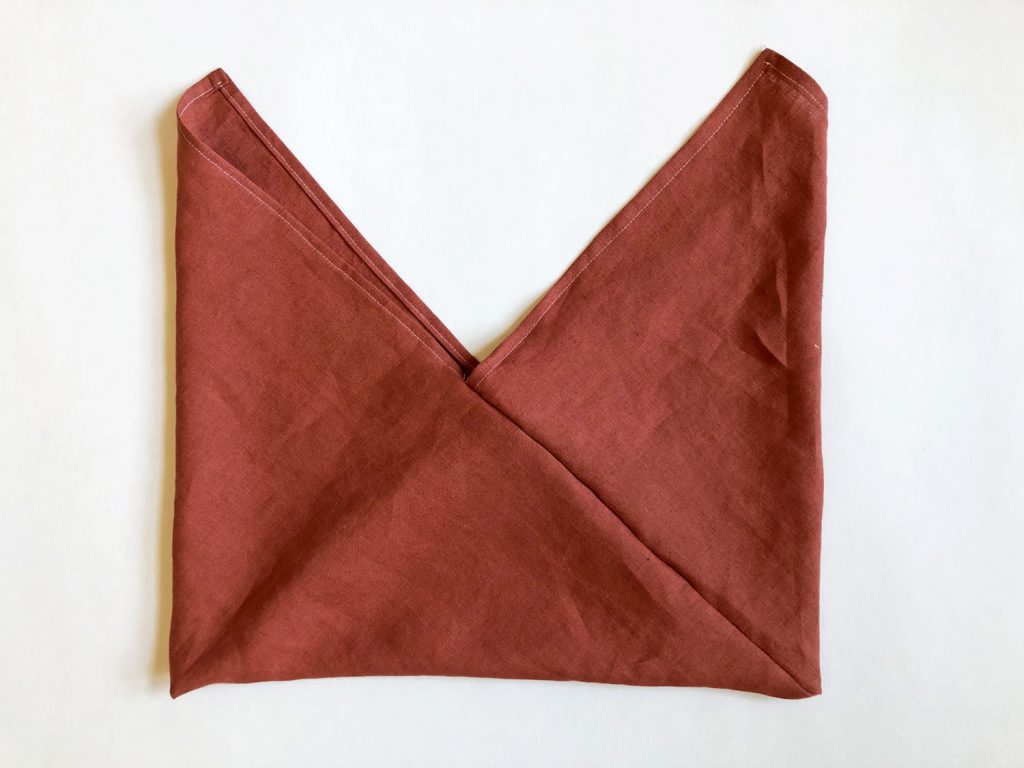
Origami folding instructions.
Step 5. Now comes the origami part of the tutorial. Lay the hemmed fabric right side up.
Step 6. First, fold the bottom left corner up so the straight edges meet to create a triangle.
Step 7. Next, fold the top right corner down to create another triangle.
Step 8. Take the bottom right corner and fold it up on the diagonal.
Step 9. Pin the bag on the front and back where the two seams meet.

Sewing bag together and boxing corners.
Step 10. Stitch the pinned seams together. I like to stitch in the ditch right next to my finished hem. Remember to backstitch at the beginning and ending of your stitch.

When turned right side out, the bag will look like this before boxing the corners.
Step 11. To box the corners, measure down 1 1/2 ” from the corner of the bag and mark it with a pen.
Step 12. Draw a line using the mark you made to create a triangle in the corner..
Step 13. Stitch along this line and trim the corner. Do this to both corners of the bag.
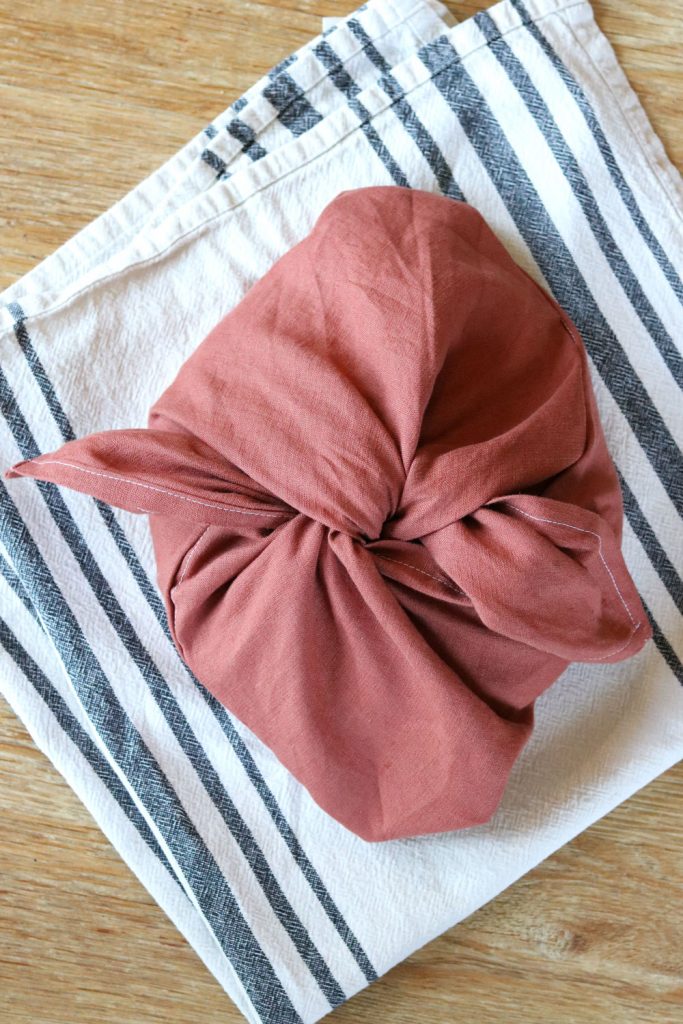
Step 14. Turn the bag right side out, and you’re finished!

It’s so cute and artisan looking! I will use the bag for bread or for fresh produce. What would you use a bag like this for?
Beautiful. Love this ♥️♥️♥️
Beautiful and easy. Well explained. Thanks a lot.